How to Take Perfect Pokémon Card Photos for eBay & Selling Online
5 min read
December 12, 2025
If you have ever listed Pokémon cards on eBay, you already know the truth: the way you frame your cards are everything.
A buyer sees your picture long before they read your title or check your feedback. A good photo makes your listing look trustworthy and professional. A bad photo makes even the most innocent sellers look… suspicious.
And here’s the amazing part — taking great photos of Pokémon cards isn’t hard at all! You don’t need an expensive camera, special lighting, or a studio. All it takes is just a bit of preparation and a few simple tricks.
In this article, I’ll go over exactly how I take clean, accurate, eBay-ready photos of my cards to make all the listed cards stand out!
Why Good Pokémon Card Photos Matter
Most collectors want to see the real condition of the card. Not an edited version, not a blurry mess, not “one photo from three meters away”, but multiple good, sharp shots of the card in different angles to see exactly what they are buying.
Clear photos help with:
- Guaranteed card
- Higher buyer trust
- Faster sales
- Fewer returns and “item not as described” complaints
When your photos look good, buyers feel confident. And confidence converts.
The Setup I Use for Pokémon Card Photography
As I’ve said in the introduction; You don’t need a studio. You don’t need ring lights. You don’t need an expensive camera, but we are going to recreate the feeling that we DID use all of the above for our photos!
Each photo needs a clear subject. For us, that is obviously going to be the Pokémon card we want to sell on eBay. But what are the other requirements for a nice photo?
A clean background
The first thing we need is a clean background. The word “Clean” can have different meanings here, so let me give you some examples:
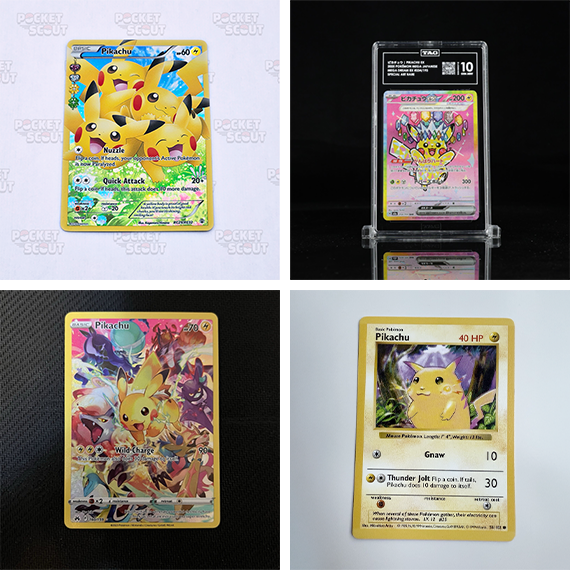
As you can see, there is no heavily patterned background, no bright flashy colors, no busy artwork and no messy areas. You obviously don’t want your dirty clothes scattered around in the frame!
Things we can use for our background are:
- A white (or black) piece of paper
- A neutral desk or surface
- A clean playmat
If you want to keep it simple and cheap, a white sheet of paper is going to be your best friend.
There are a couple of ways to stand out even more when listing Pokémon cards on eBay. I use a white sheet of paper with a subtle, very soft logo of my brand as you can see in the image of the different backgrounds.
There are others going even crazier by creating a nice scene where the card is displayed.
By doing something unique, people will recognize your listings even faster when scouting for cards on Pocket Scout or eBay!
Natural Lighting
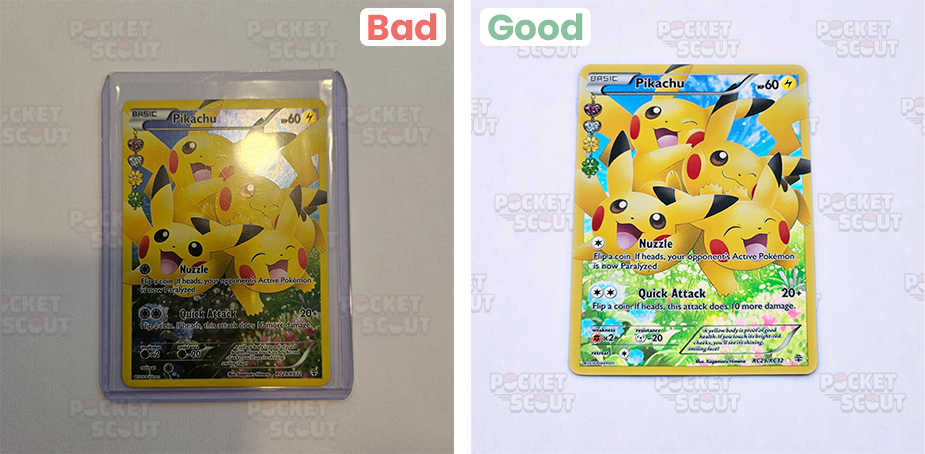
This is the biggest improvement you can make
I take all my photos next to a window during the daytime. Natural light removes ugly shadows, reduces glare, and shows true color.
If the sunlight is too strong, rotate the card slightly or pull the curtain so the light becomes soft and diffused.
If you have no sunlight at all, I recommend waiting till there is. If you live in an area where good sunlight is rather “rare”, try taking the photos when there is at least a little bit of natural light. If you’re even too unlucky for a bit of natural lighting from time to time, find yourself a spot in a room where the lighting can be consistent.
A general tip is to avoid hard shadows. Direct sunlight or bright spotlights often cast them, so make sure that the light is diffused enough.
Your Phone Camera is Plenty
iPhones, Pixels, Samsungs… they all work just fine.
Make sure to clean your camera lens (seriously — fingerprints and dust are the enemy here), and make sure the card fits neatly in the frame (I would use a 1:1 aspect ratio since it fits best in eBays layout, or crop the image afterwards). Also make sure your chosen background covers the whole picture, not only half of it.
If you place your Pokémon card on some sort of “pedestal”, you can even use a phone-stand to take photos from the same, consistent angle.
My Step-by-Step Photo Process
This is the exact workflow I follow every time I list a card on eBay.
Step 1 — Position the card with care
After you have chosen your background and you’ve found a great spot with lots of natural lighting, it’s time to set the card in place. You can use a little card-stander (as mentioned before) to place the card on, or just put the card flat on your clean background.
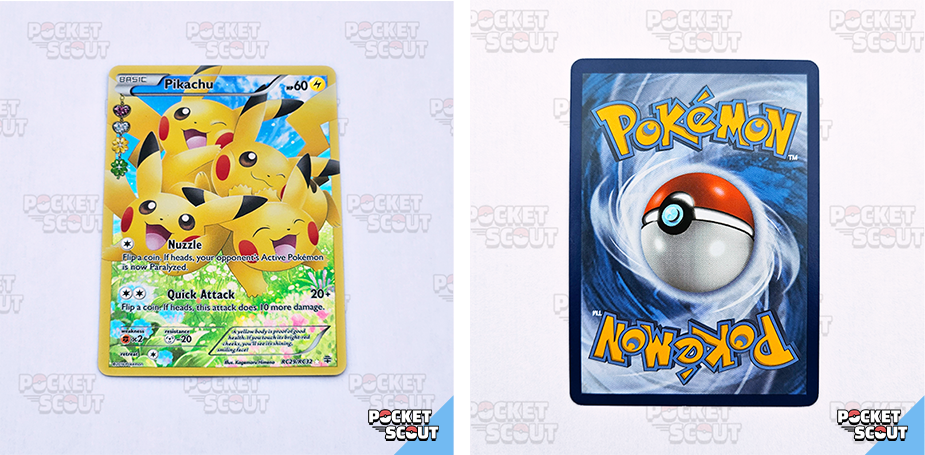
Step 2 — Front Photos
When your card is in place, it’s time to take the pictures. I take multiple shots of the front that showcase:
- Full front
- Shot of each corner
- Angled shots for holo patterns and textures
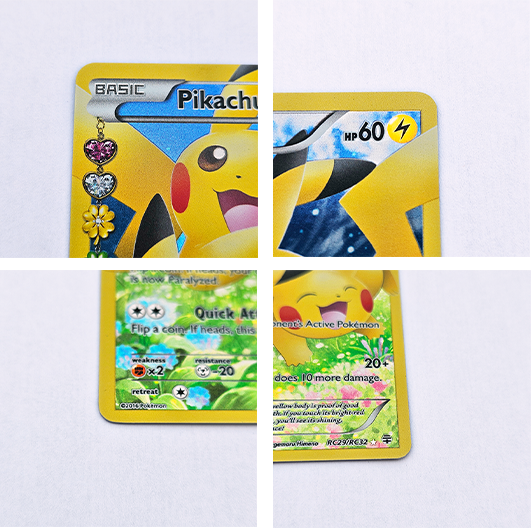
Doing these 3 will cover all front photos you need.
Step 3 — Back Photos
My principles for the back photos are more or less the same as the front:
- Full back
- Shot of each corner
- Angled shot for scratches if needed
Multiple photos of angled shots are maybe a little too much, but if certain scratches are not super visible in the other back photos, make sure to take at least 1 angled shot that showcases the specific scratches.
Step 4 — Condition Close-Ups
The last shot I would do are a few extra close-up shots of imperfections. There might be a printline, a little dent or some whitening that you only see at certain angles. Make sure to capture these as well.
If the card is near-mint or better, some general close-ups help you prove it. If the card has flaws, close-ups help you avoid returns.
Tip: If you are using a white background, whitening won’t always be super visible, even with close-up shots. You can hold a darker object (like a black paper) underneath the card so the whitening can be captured.
Step 5 — Listing Consistency
Chances are you are going to sell more than 1 card. Make sure to take all your photos in the same style:
- Same lighting
- Same background
- Same angles
Buyers love consistency, and it will make your listings look trustworthy.
Extra
In the guide above, you’ve got a well documented process on how to take clean pictures to list your Pokémon cards on eBay, but you can even do a little something extra!
If you want customers to recognize your cards even more, you can put a little self-made logo in one of the corners on the image (similar to the soft logo-pattern in the background). When you do that, make sure that the logo does not overlap your card of course.
I personally use Photoshop to create all my images for Pocket Scout, but Canva is a great free tool to do similar things where you can even generate your logo with AI if you don’t have one yet!
Final Thoughts
Good Pokémon card photos are not all about being “fancy”, they’re about being clear, honest, and consistent.
Natural light, a clean background, and five minutes of preparation make your listings instantly more professional — even with a basic phone camera.
Great photos sell cards faster.
Great photos reduce returns.
Great photos make your store stand out.
If you love your cards, show them for what they are — clean, detailed, and easy for buyers to trust.